How to Make a Restaurant Menu
Creating a restaurant menu design involves arranging dishes in a way that encourages customers to order. Well-crafted custom menus can boost sales, especially when offered in both print and digital formats.
Digital menus can increase restaurant revenue by 25–30%, but when paired with high-quality food imagery, that increase can soar to as much as 65%.
To reach more customers and drive orders, ensure you create both a printed menu and a digital restaurant menu.
Remember that building a profitable menu requires the right format, structure, pricing, and design. Below, I’ve outlined 11 actionable steps to help you get started.
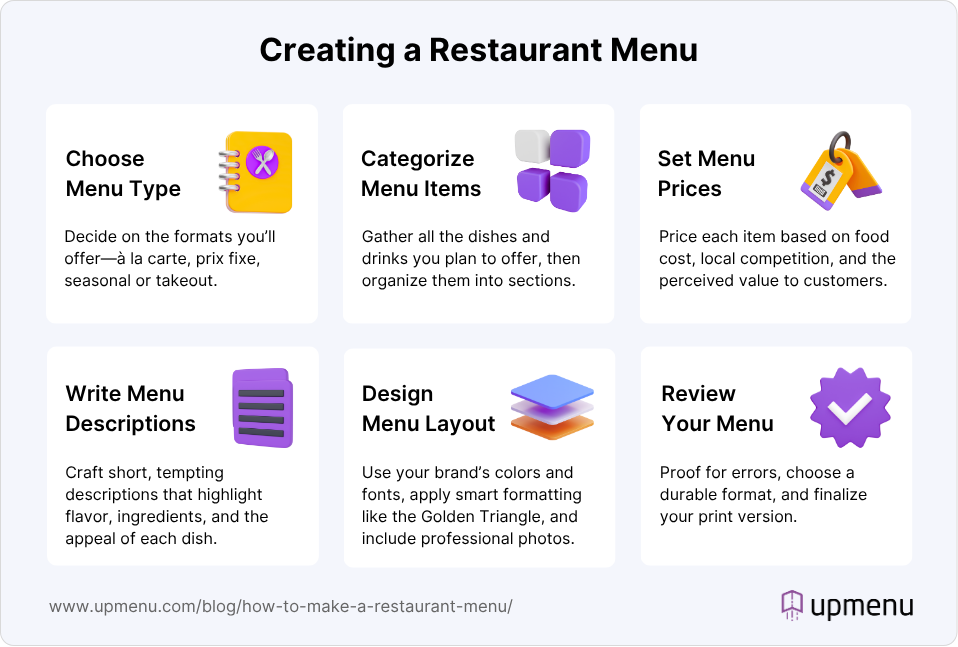
Step 1. Choose the Types of Menus Your Restaurant Will Offer
The very first step is to decide what types of menu you will offer. Below, I’ve listed some of the most common menu formats restaurants use, each designed to serve different customer needs and business goals.
Step 3. Decide on Menu Categories
The next step is to create restaurant menu categories. These could include, for example, breakfast, starters, soups, main courses, and drinks.
Once your categories are set, consider which menu items you want to promote most. For example, which high-margin main dish should appear at the top of the list, and why?
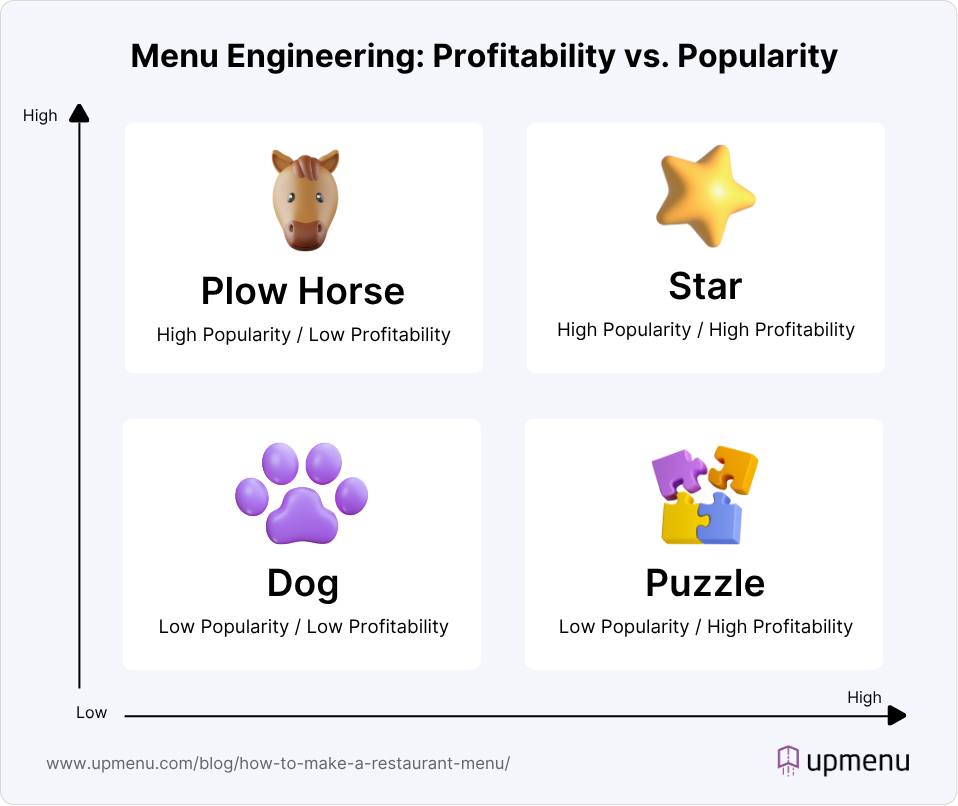
A recognizable method of grouping menu items into four categories based on their profitability and popularity is a key part of the menu engineering process. These categories include “plow horses”, “stars”, “dogs”, and “puzzles”, which represent your menu items.
A study by the Cornell Food and Brand Lab found that consumers are 27% more likely to choose a menu item with a descriptive name over a standard one.
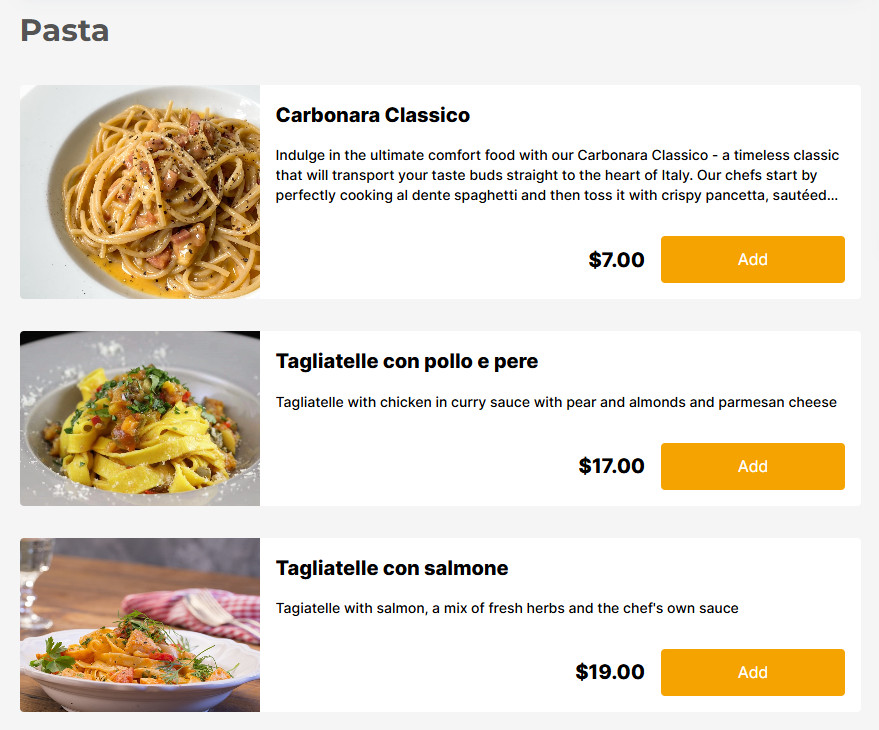
That’s why, for example, instead of listing an item as “Grilled Chicken”, renaming it “Herb-Marinated Grilled Chicken Breast with Roasted Garlic Aioli” can make it sound more appealing and increase the chances a customer will order it.
You can also use a simple name and then provide a vivid description underneath to enhance its appeal without overwhelming the menu. For example, list the item as “Grilled Chicken” and follow it with a description like “Juicy, herb-marinated chicken breast served with roasted garlic aioli and seasonal vegetables.”
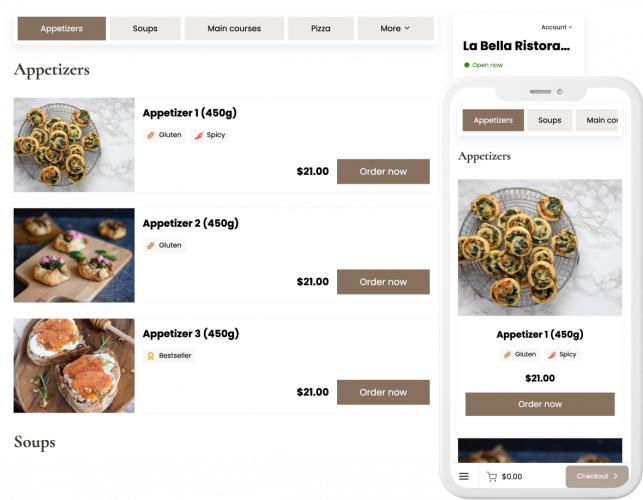
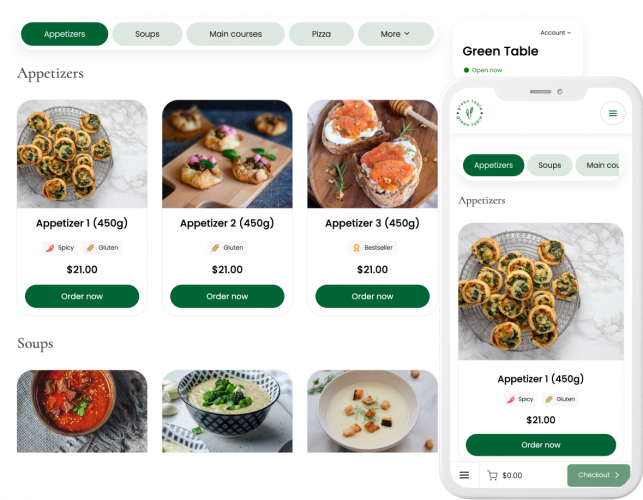
Step 6. Choose a Color Scheme
Selecting the right colors for your restaurant menu can reveal a great deal about your brand, so making thoughtful choices is crucial.
The colors of your restaurant menu should be consistent with your restaurant branding and interior design. Moreover, the colors you pick can influence your guests’ hunger levels.
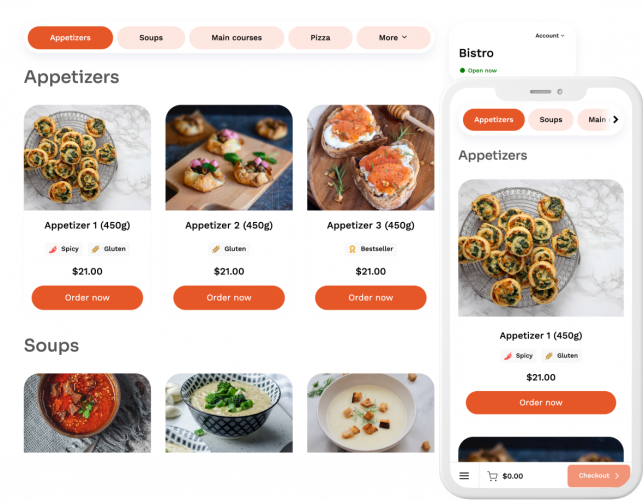

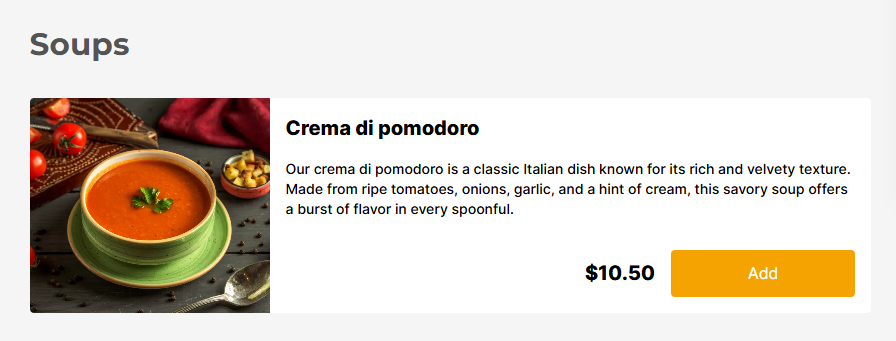
Step 8. Include High-Quality Restaurant Menu Photos
When designing a printed menu, maintain a balance. Ample white space makes the menu visually appealing, while overloading it with photos or icons can distract from the main content.
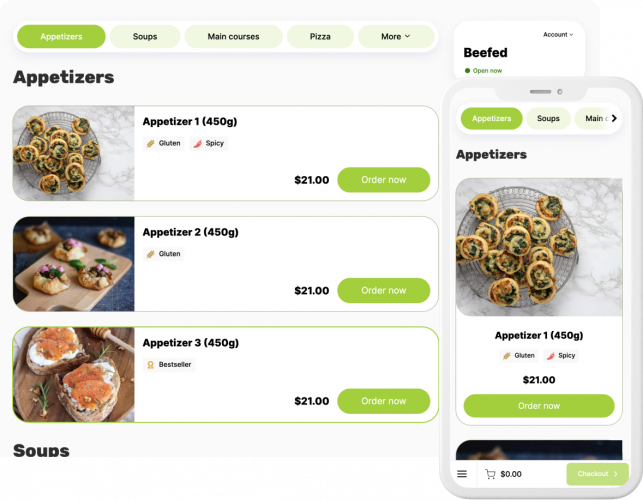
If adding images, ensure they are high-quality—blurry photos can deter customers. Focus on featuring pictures of your most popular or high-value items to draw attention and boost sales.
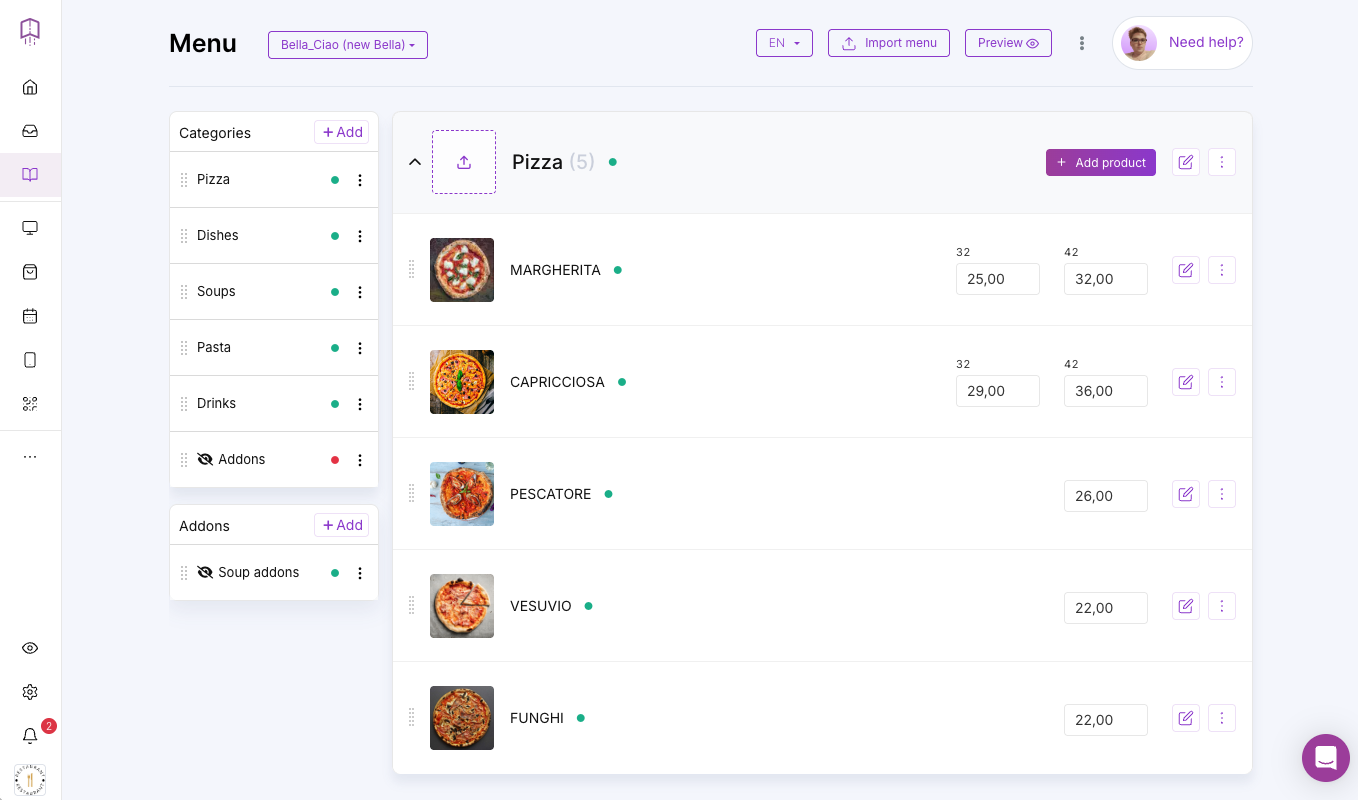
Remember to add your high-quality pictures to your restaurant’s online menu as well. In UpMenu restaurant menu maker, you can simply do this by clicking the upload icon on the left side of your menu item and adding a product image.
Here is a list of food photography tips to help make your restaurant’s dishes more tempting and attractive to your customers.
Alternatively, you can hire a professional photographer, but you must face additional costs in this case.
Step 9. Define Fonts, Layout, and Brand Style
Now that you’ve created a list of menu items, organized them into sections, and selected your color scheme and photos, it’s time to decide on the fonts, spacing, and overall layout of your menu.
You can do this yourself, for example, by using a free menu maker, or hire a professional to help you design a polished food menu.
Pay attention to overall menu composition, use consistent spacing, balanced margins, and precise alignment to improve readability. A well-composed layout looks professional and subtly influences ordering behavior.
Regularly updating your menu should be simple and help keep things fresh and exciting for your customers.

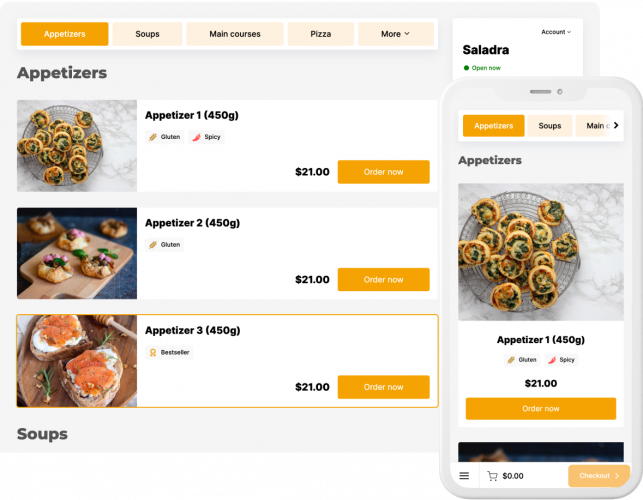
Step 10. Choose the Final Menu Format and Layout
After following the previous steps, you’ll have a few design options to choose from. Pick the custom menu design that best reflects your restaurant’s concept and appeals to your customers.
Consult with your staff or friends to gather feedback before making a final decision.

Step 11. Review and Print Your Menu
Before printing your restaurant menu, carefully proofread it to ensure that spelling, grammar, formatting, and consistency are accurate. Typos or layout issues can make a bad impression, so consider asking a colleague or friend to review it as well.
Once everything is checked, you’re ready to print your menu. Be sure to choose the right size and paper quality. The paper should be durable and of high quality, with a weight that suits your menu’s format and design.
When selecting the size, take into account:
- Font size
- Number of menu items
- Overall layout and spacing
Optimize Your Online Restaurant Menu
Now that you’ve created and printed your restaurant menu, it’s time to set up an online menu.
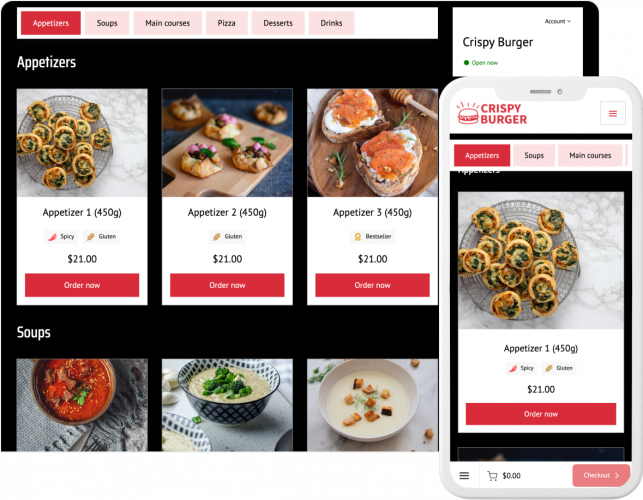
When creating your online restaurant menu, make sure it’s easy to navigate, mobile-friendly, and optimized for fast loading to enhance the customer experience.
Below, I’ve outlined the key tips on how to make a restaurant menu online.
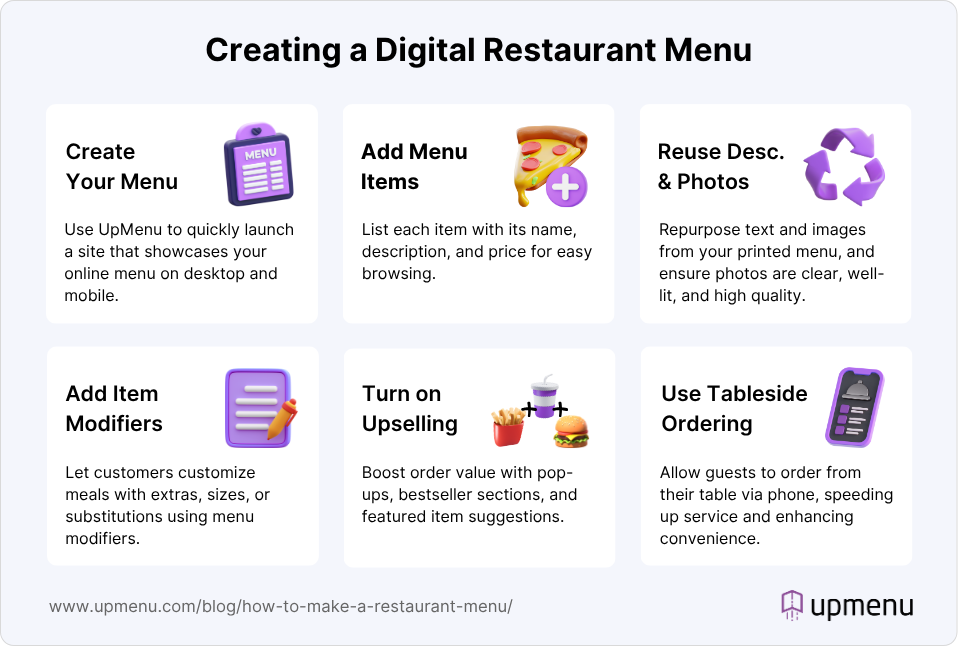
1. Use UpMenu to Create Your Digital Menu
When you create a digital menu with UpMenu, it works just like a restaurant website. This means you can:
- Use it as a standalone solution
- Install it on your existing website
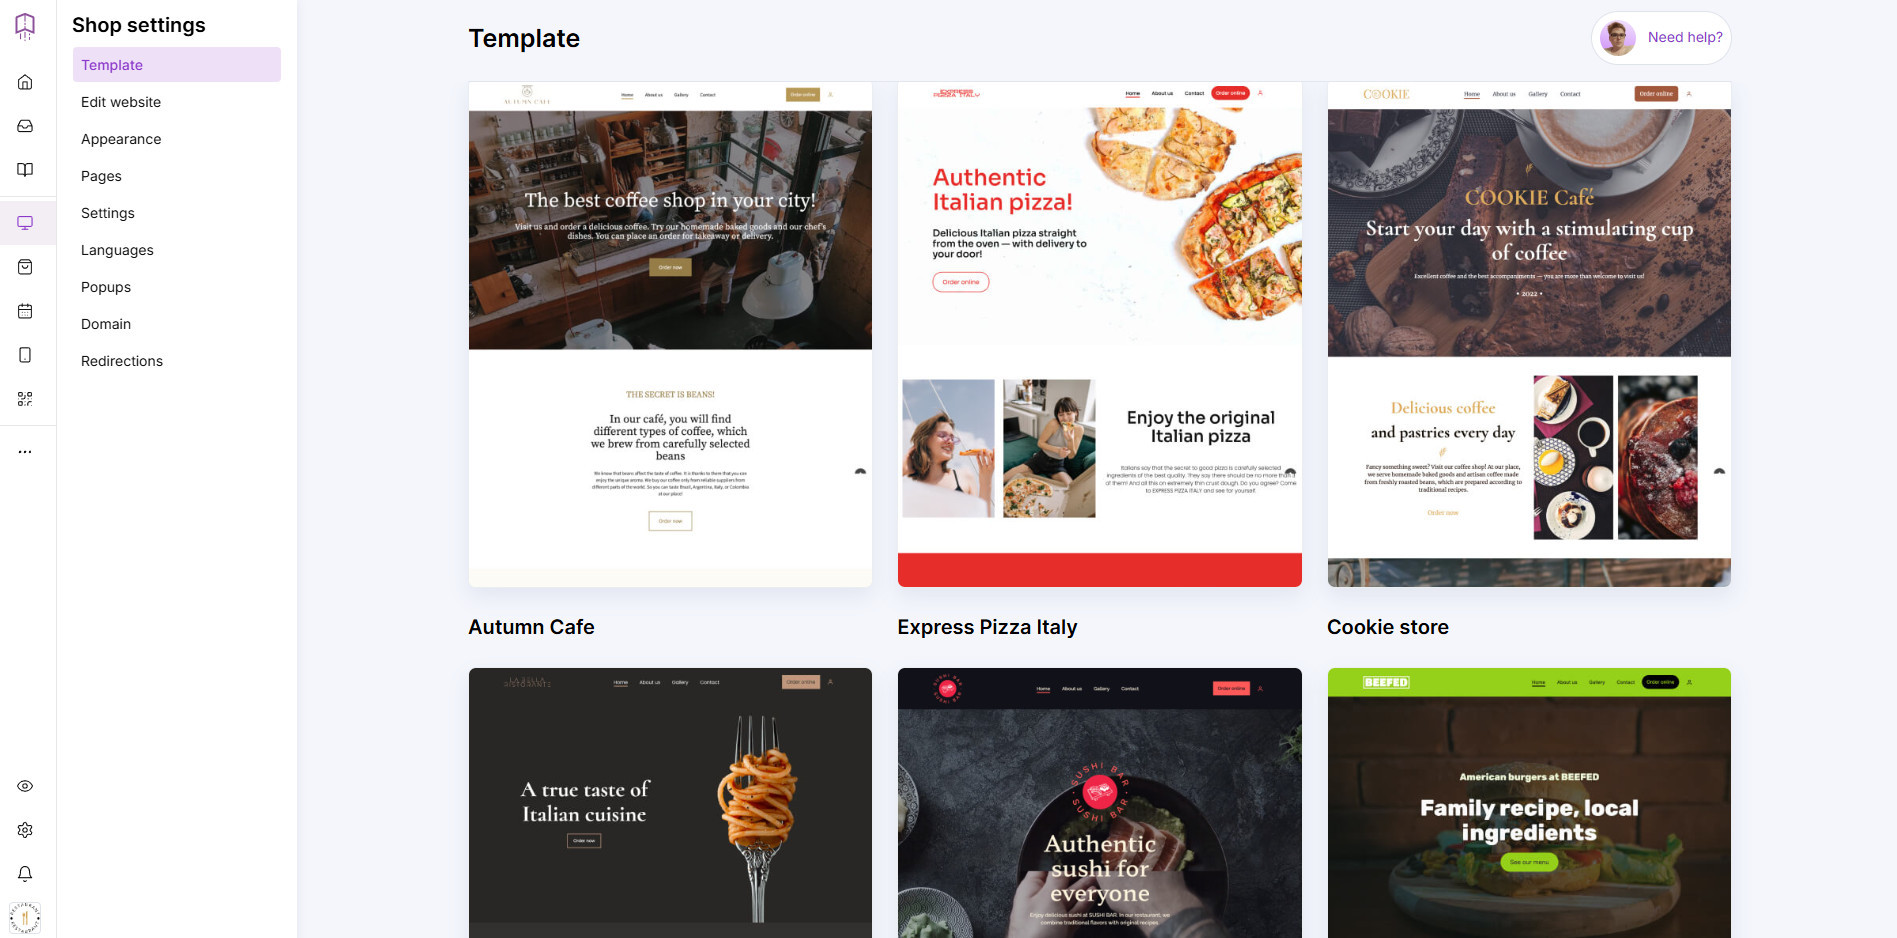
- Build a new restaurant website using the UpMenu restaurant website builder
If you choose to create a restaurant website using the builder, select a menu template and customize it to match your brand and menu offerings.
Enter each item on your menu, along with its name, description, and price.
3. Reuse Descriptions and Photos from Your Printed Menu
Remember that you can add the same menu item descriptions and photos as you used for your printed menu.
Bear in mind that you’ll need high-quality photos of your dishes. Take clear, well-lit photos of each item on your menu.
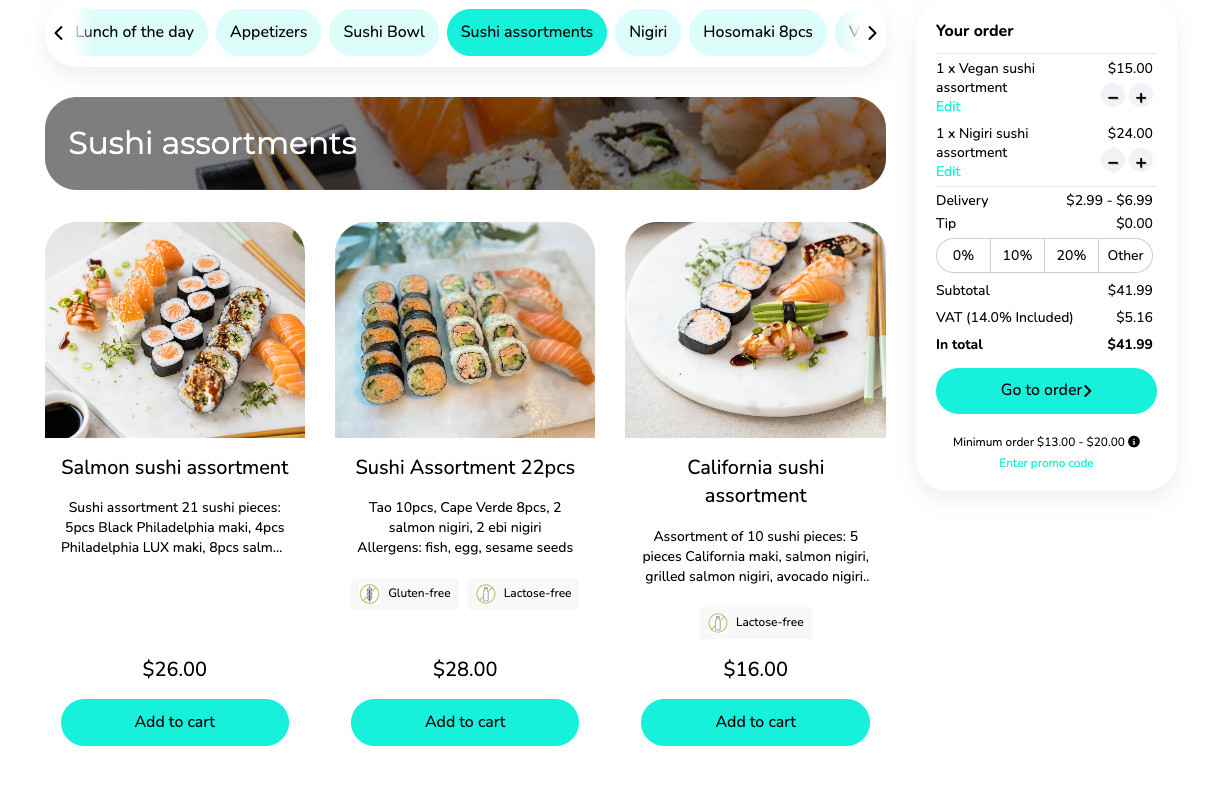
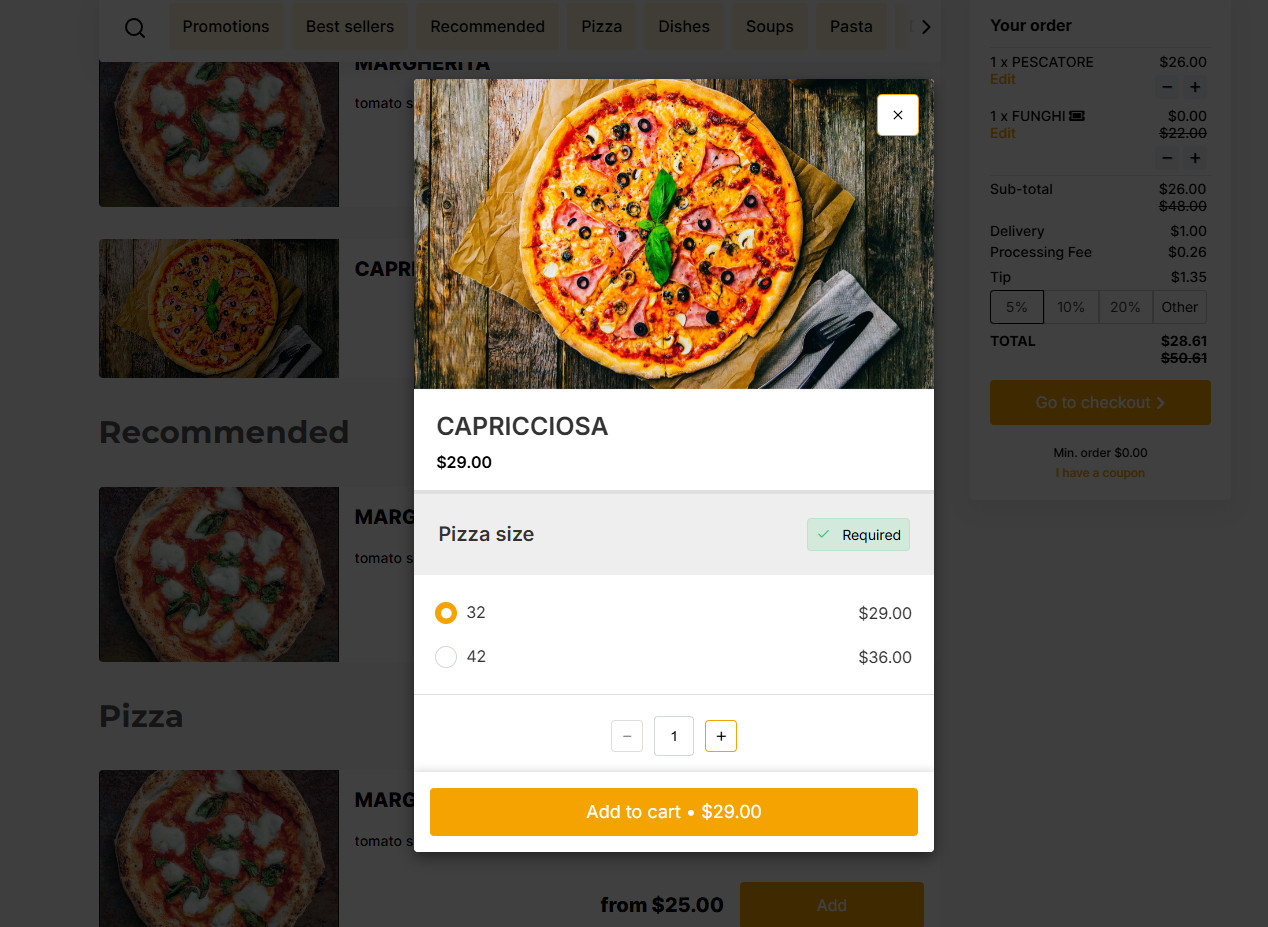
4. Add Modifiers for Customization
Let guests personalize their dishes by selecting portion sizes, choosing free or paid extras, or swapping ingredients.
Menu item modifiers are a valuable feature of menu management software, allowing restaurants to offer additional ingredients, substitutions, or upgrades.
This feature also enables flexible pricing based on portion size or selected add-ons, giving customers more choice while increasing order value and average check.
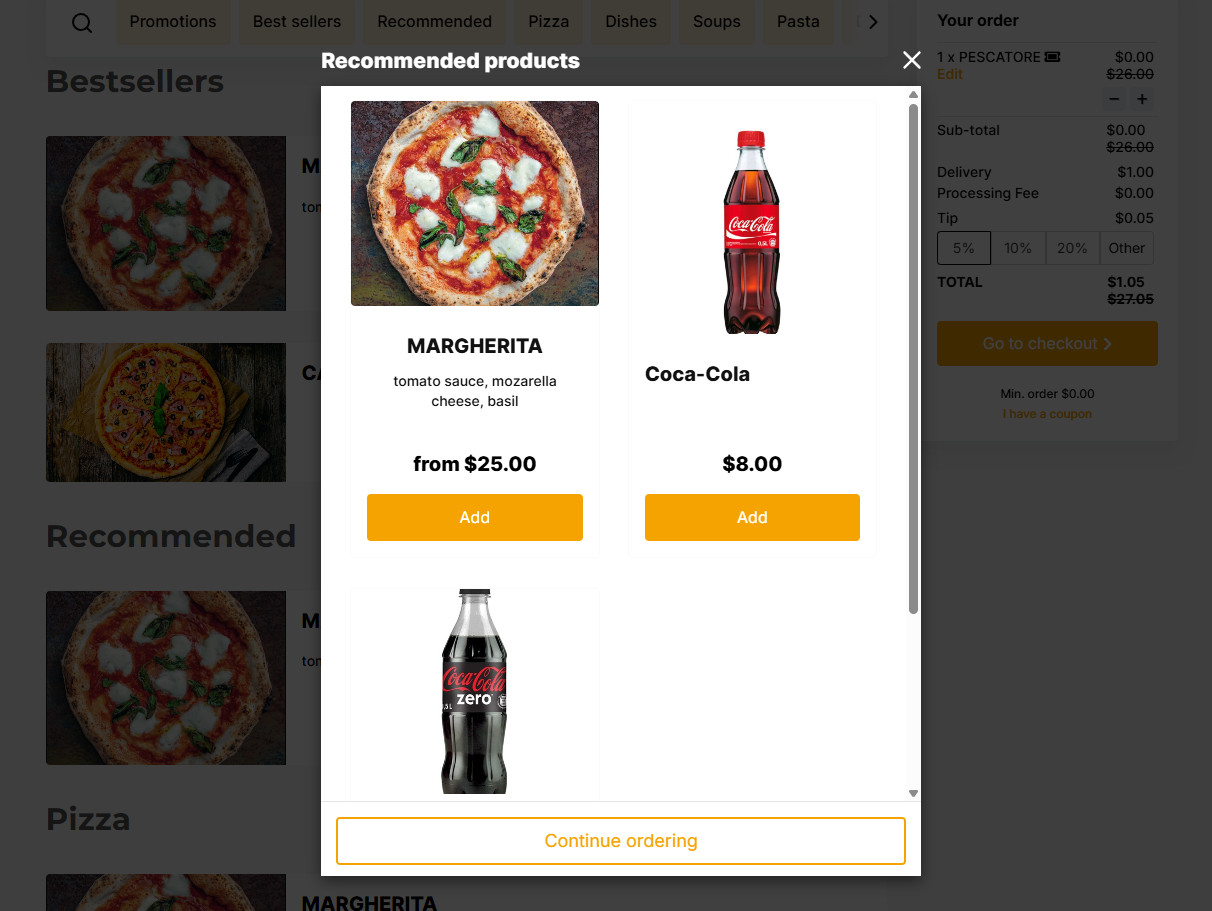
5. Use Upselling Recommendations
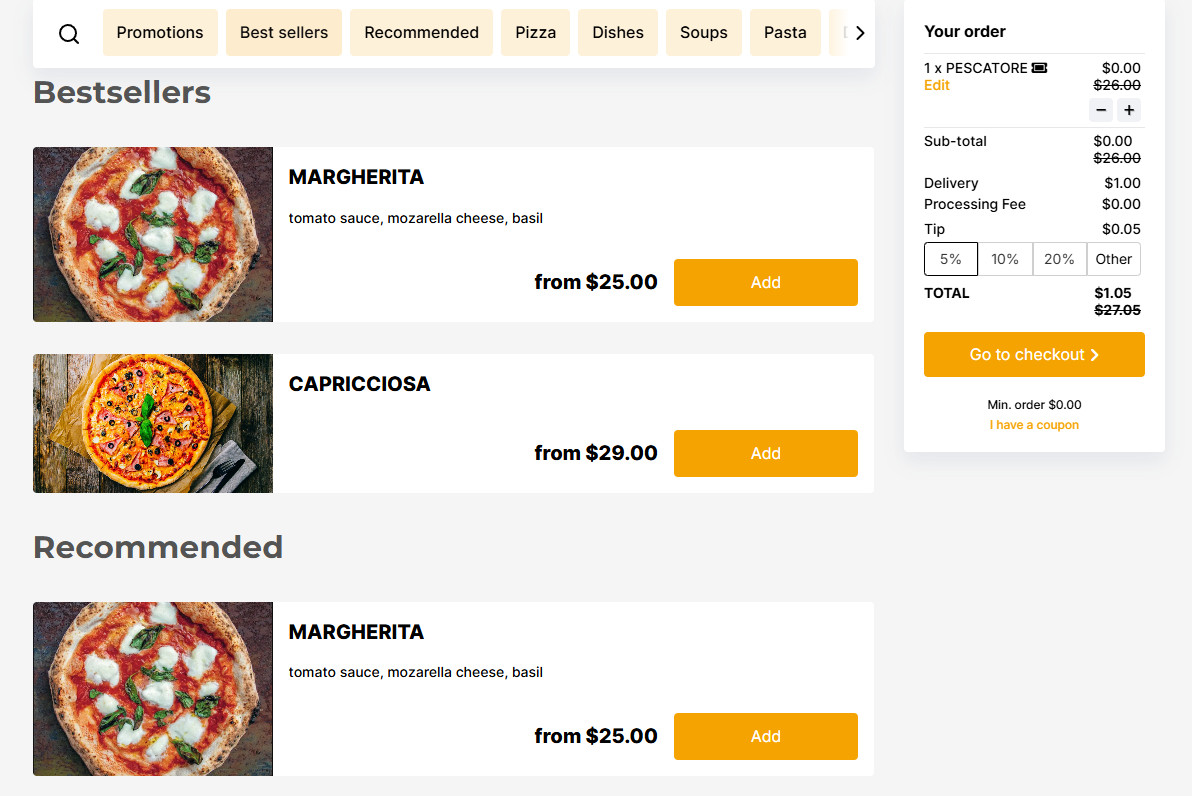
Increase sales by suggesting bestsellers or recommended items directly on the menu. Utilize methods such as highlighting popular dishes or displaying a pop-up with add-ons before checkout.
Upselling not only boosts the average restaurant revenue but also enhances the customer experience by guiding them toward popular or complementary choices. Most online menu tools offer built-in upselling features to simplify this process.
6. Create a QR Code Menu for Easy Access
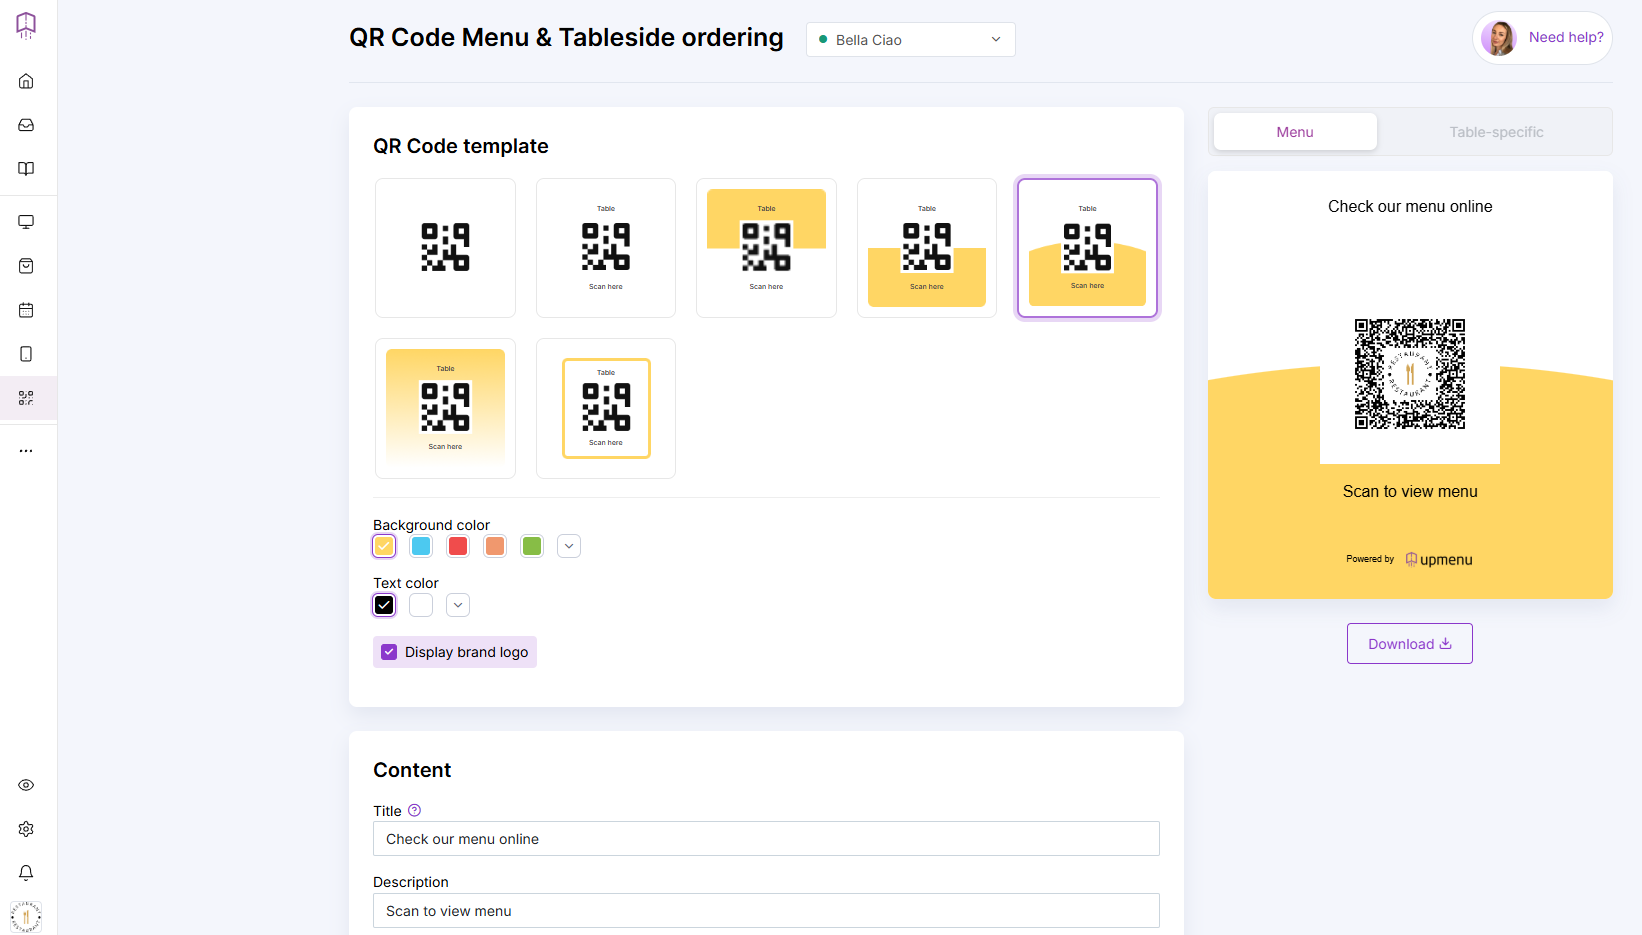
Create a QR code menu to let guests scan and access your digital menu anytime, which is perfect for dine-in, takeout, or restaurant promotions.