Contact Login English

20 Food Photography Tips & Tricks For Restaurants

Content

Restaurants thrive thanks to eye-catching food photography. Ensuring photos of your menu items meet customer expectations is crucial to success. And best of all? Stunning images are achievable without professional help or costly equipment. Explore our 20 food photography tips for restaurants to help your business stand out.

What is food photography? 

Food photography is about capturing visually appealing images of food and beverages, highlighting their textures, colors, and presentation. A food photograph is used for various purposes, such as advertising, menus, cookbooks, social media, and food blogs, to entice viewers and showcase culinary creations.

Why is food photography important for restaurants?

Food photography is essential for restaurants as it can significantly influence customers’ perceptions and decisions. In other words, taking quality food pictures is meant to increase sales in your restaurant.

  • According to the Visual Objects study, 75% of consumers state that the photos they see on a restaurant’s website influence their decision to dine there (source: Visual Objects, 2021)
  • Grubhub’s study found that restaurants that feature high-quality food photos on their menus see a 30% increase in sales on average compared to those without photos (source: Grubhub, 2019)
  • A Cornell University study demonstrated that when a photo accompanies a menu item, it can increase sales by 6.5% (source: Cornell University, 2014)

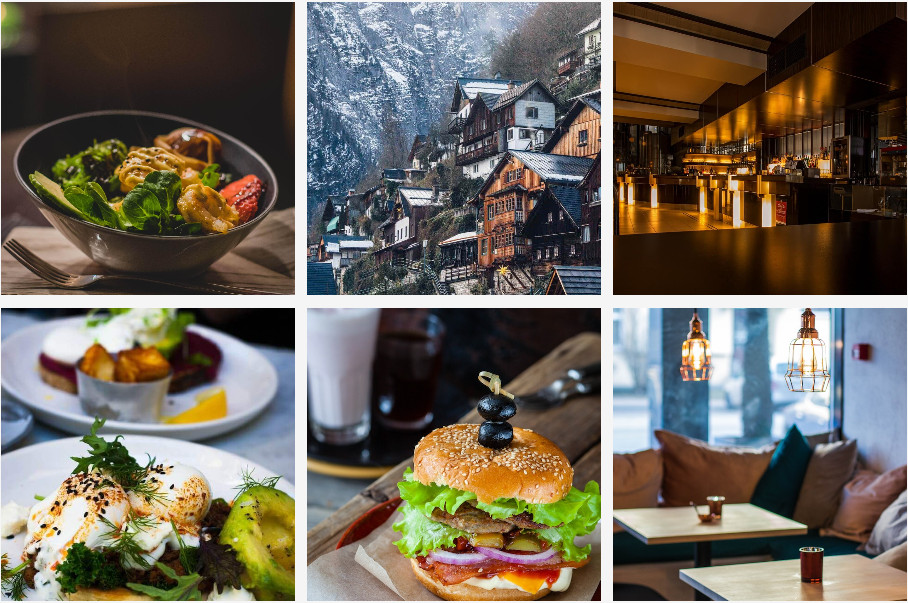
What makes a photo good? 

Beautiful food photos should show the best aspects of your dishes and make them look delicious. If the image of your food is not making your mouth water, try again. Check our food photography tips in this article and learn what you need to become a professional food photographer. 

Share your restaurant pictures on your website to attract more clients

The most common mistakes when taking food photos are:
  • Photos are blurry – try shooting with a mobile or camera tripod or use the stand in food photography to keep the frame steady.
  • Colors don’t look right – if your colors don’t look real, try to fix the white balance when editing and try to use as much natural lighting as possible.This will help you make your pictures more vibrant. 
  • Photos don’t “Pop” – when photographing food, identify what your images might be lacking. Sometimes, a few minor edits can make a huge difference. You might not have enough light, or your light source is too far away. Utilizing a food photo editor can effortlessly enhance the visual appeal of your dishes, making them irresistible to viewers.
  • The photos are not visually consistent – If you have a collection of photos of your menu items, you should remember to make them visually consistent, meaning they should have a similar angle, character, or background. This will make the restaurant’s menu more readable and inviting for the viewer.
Restaurant Marketing Tools
Market your restaurant with ease
Increase orders by 70% using our all-in-one restaurant marketing tools, no expertise required.

20 food photography tips

How can I make my food look good in pictures?

There are numerous methods to enhance the appearance of your food in photographs. We’ve compiled a list of 20 food photography tips to help your restaurant’s dishes appear enticing and appealing to your customers. Check our food photography tricks below. 

1. Natural light is essential (avoid flash)

Remember that using natural lighting is the basic rule of food photography. While natural light is attractive, avoid placing your food in an area with vivid sunlight. Direct sunlight often results in harsh, prominent dark shadows and causes whites and light hues to become overly bright, losing their distinctive texture and form. 

If you don’t have natural light, you can also use artificial lighting, but make sure it creates a soft light. Artificial light can be controlled, which means you decide on how much light is used and the warmth. Shooting food photography is all about using light to your advantage.

Quote

“Flash photos of food create harsh reflections and glare as well as funny-looking fall-off—your food looks like it’s floating in space.” Source: Serious Eats

One of the most important food photography tips is to avoid direct sunlight in your pictures

2. Add a touch of oil or spray the food with water

Professional food photography creators often add a touch of oil or spray the food with water. This trick will make your images pop and your food will look more attractive to the customer. It takes some experimenting, but once you have put together the perfect dish and applied oil or water, you’re ready to create some exceptional pictures.

Use natural lighting in order to take good food pictures

3. Vary the arrangement of different dishes 

Avoid arranging your dishes the same way all the time. Instead, vary the arrangement to add variety and visual interest to your food photography. Don’t worry too much about where each part of the dish goes. Make it look nice and natural instead.

One of the essential food photography techniques is to change a dishe’s arrangement

4. Experiment with depth of field

Depth of field definition

Depth of field (DOF) refers to the distance range within a photograph where objects appear sharp and in focus. The aperture, focal length, and the distance between the camera and the subject determine it. 

In photography, a shallow depth of field has a small area in focus, typically used to create a blurred background and draw attention to the main subject. Conversely, a deep depth of field has a larger area in focus, capturing more details in the background and foreground, often used in landscape photography. Manipulating depth of field allows photographers to emphasize the subject and create a desired mood or effect in the image.

Try taking close-up pictures that focus on the food while the background is blurry. It can be helpful when it comes to making interesting textures stand out more. This works great for dishes like pasta and many professional food photographers use a lot of depth of field in their photos.

Depth of field is a great element to experiment with in restaurant menu photography

5. Remember the rule of thirds

The rule of thirds definition

This is a basic composition guideline in photography and visual arts. It involves dividing an image into nine equal parts by imagining two equally spaced horizontal lines and two equally spaced vertical lines.

The rule suggests placing the main subject or points of interest along these lines or at their intersections to create a balanced and visually appealing composition. This technique often results in a more engaging and dynamic image than centering the subject.

During a shoot, knowing how the rule of thirds works is essential. This will help you make your pictures come out better when the main subject isn’t right in the middle but rather placed in one of the “thirds” of the image.

How to take pictures of food using the rule of thirds

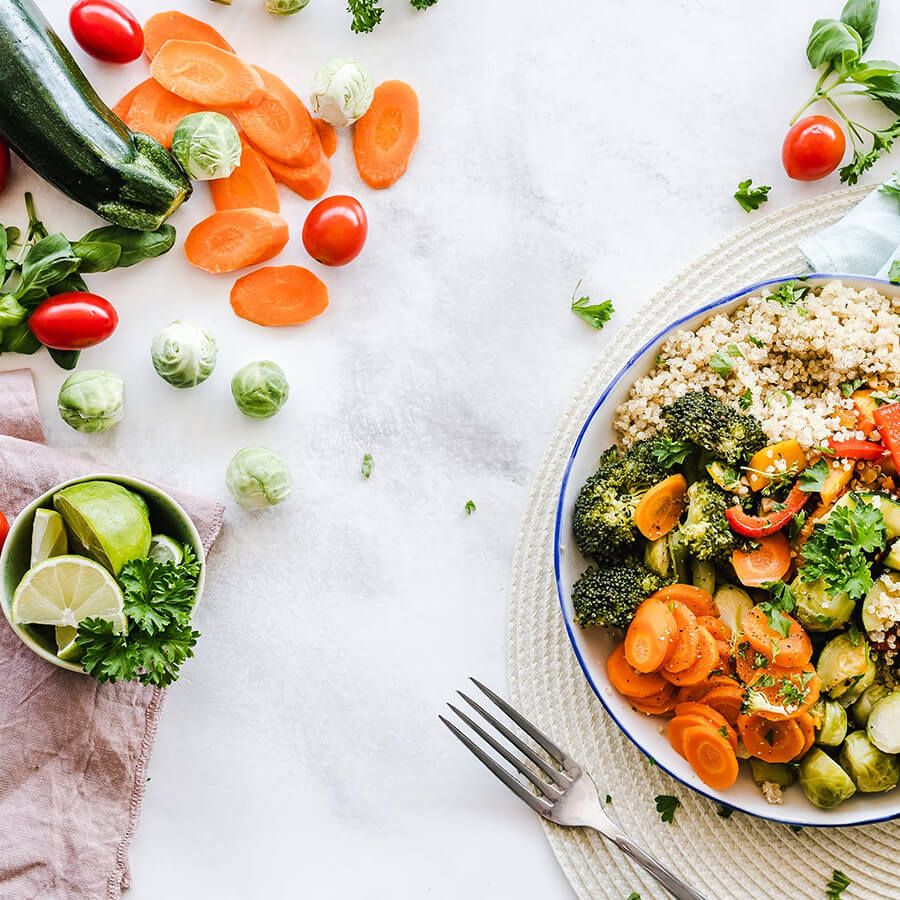
6. Experiment with various photo angles

Try to take pictures at different angles. Focus on the part of the dish you want to emphasize. For instance, a sandwich or a burger may appear most appetizing when halved and photographed from the side. As for salads, take photos from above using the flat-lay method, as it best displays the various ingredients’ detailed arrangement.

Example pictures of restaurant food from different angles

7. Incorporate ingredients from the dish as food props

This will give you context and visual interest and highlight the freshness and quality of the components used to prepare the meal. Photograph food like oats, berries, and nuts, or disassemble one of your sandwiches to show what goes into it.

 Include your ingredients in your restaurant food pictures

8. Don’t draw attention from your main dish

Avoid overshadowing the main subject in your food photos. Instead, set up your space, focus on the dish, and use simple, complementary backgrounds and props to enhance the visual appeal without taking attention away from the food. Work with props that complement your main dish.

When creating beautiful food photography, capture the surrounding area

9. Ensure your plates are spotless

This might sound ridiculous, but a dirty plate, glass, or tablecloth can ruin your photo. So check your plates before taking a shoot, and make sure they are clean. Like your plates, it also helps to check the table for smudges.

10. Maintain a tidy background

Another trick for taking great food photos is maintaining a clear background to avoid distractions. For example, you may need to clear the table of clutter and ensure the background won’t draw attention away from the dish. The best food backgrounds include dark, light, and wooden surfaces.

For fine dining photography, make sure to keep a clean background

Restaurant Marketing Tools
Market your restaurant with ease
Increase orders by 70% using our all-in-one restaurant marketing tools, no expertise required.

11. Consider incorporating movement

Introduce motion when it’s fitting and appropriate. It needs to feel natural. For example, you can show pouring a drink or sprinkling the dessert with powdered sugar in the picture.

An example of food photography for menu items

12. Showcase your restaurant design

One of the most important food photography tips is showcasing your work. Of course, this influences your restaurant’s brand awareness among customers. You can include parts of your restaurant’s design in your food photos so customers can see the decorations and feel the atmosphere.

An example picture of a restaurant with food

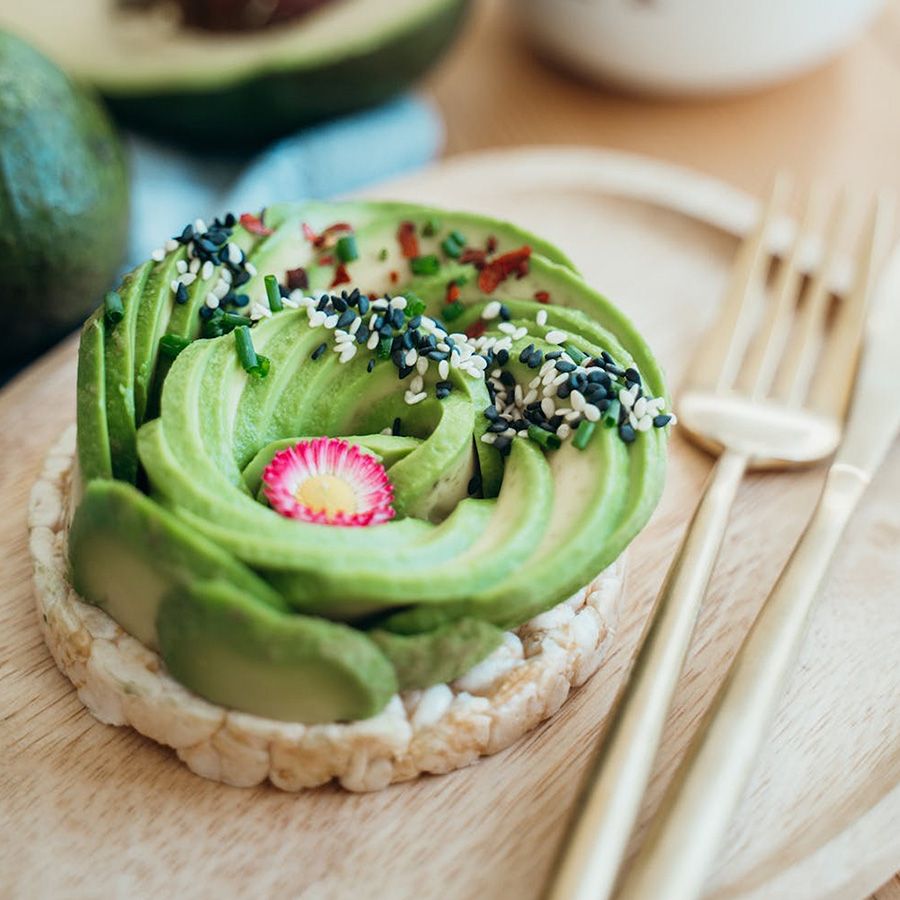
13. Decorate your dishes

While taking food photos, consider using decorations in different colors that stand out on the food. Remember that bright colors like green (parsley, chives), red (strawberries, chili), and white (mozzarella, cream) work well. Think about colors that go well together. In addition to selecting the right decorations, paying attention to your product’s packaging can significantly enhance the visual appeal and set the right expectation for your customers.

An example restaurant picture of food

14. Think about the composition. Use lines and layers for food photos

We already mentioned the importance of decorating food photos, using props, and not distracting customer attention from the main dish. Here comes the ability to use lines and layers. You can organize your props using lines and layers to guide the viewer’s attention to the main dish – your photo hero. This way, the props won’t be distracting but will contribute to the overall image.

One of the key professional food photography tips is to use lines

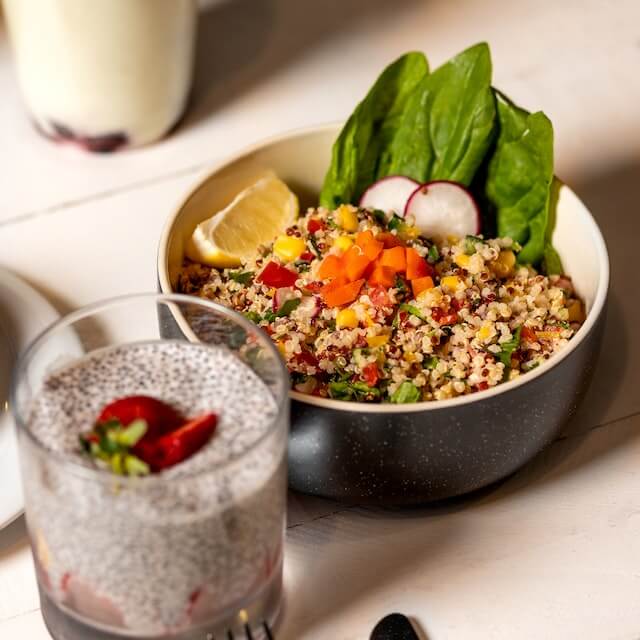
15. Use fresh ingredients

Always take photos of food when it is hot and freshly cooked. You can also decide to take pictures during the cooking process. For lettuce, salad, etc., put them in cold water for a few minutes before taking pictures to make them look fresh.

16. Incorporate realistic and appetizing colors

Another of the food photography tips is to use authentic and delicious colors. This helps evoke a sense of freshness and entices viewers to try the dish. However, don’t use too many bright colors, as it may be overwhelming. Instead, opt for less distracting colors in tablecloths or place settings. For example, a white plate will be better than a colorful one to draw attention to your main dish.

Great food photography should include bright, vibrant colors

17. Don’t use too much food for plating

Here comes a well-known rule ‘Less is more’. You may want to fill the plate with food, but this doesn’t always look okay on camera. Overcrowding the plate can make it difficult for viewers to focus on essential elements. Remember to leave enough space on the plate for the audience. One of the food photography tips is about focusing on simplicity.

The best food backgrounds shouldn’t be too empty

18. Capture close-up and distant shots

As you explore different angles, compositions, props, and backgrounds for your restaurant pictures, consider experimenting with various shooting distances. You can take both close-up and distant shots. Consider taking a close-up picture if your dish has some exciting features or elements you want to emphasize. Don’t be afraid to experiment!

One of the key food photography tips to take close up shots

19. Edit your photos

To enhance your food photos, consider:

  • Sharpening the image to emphasize details and textures.
  • Fixing the white balance to ensure accurate and appealing colors.
  • Adjust brightness and contrast to create a balanced and striking visual.
  • Increasing saturation to bring out the vibrancy and intensity of colors.

You can introduce such changes using photo processing programs.

Modern food photography often requires editing

20. Don’t be afraid to get creative!

Try different compositions, and experiment with props, lines, and layers. Photograph at different angles, and enjoy the process. Remember that food photography is an art. Don’t let your imagination limit you. 

Create a similar website with a restaurant website template

I took photos of the food. What’s next?

Taking beautiful photos of food and the restaurant won’t make a difference if your customers don’t see them. Here are 6 ways to use them:

  1. Add the photos to your menu, both online and printed, to give potential customers an idea of what to expect.
  2. Update your restaurant website with new photos to showcase your dishes and create an inviting atmosphere. You can create a gallery and update the home page to showcase the photos from the start. If you don’t have a restaurant website, you can build it with UpMenu on your own by starting with restaurant templates 
  3. Share the images on social media platforms to engage with your followers and attract new customers. Don’t forget to put hashtags like #foodphotography to make your posts more visible
  4. Use the pictures in promotional materials, such as flyers, brochures, or posters, to catch the eye of passersby.
  5. Display the images inside your restaurant to create an appealing and cohesive visual experience for diners.
  6. Submit the photos to online review sites and food apps to enhance your restaurant’s online presence and reputation.

Key Takeaways

  • Good food photos are meant to increase sales in your restaurant by 6.5% to 30%
  • Food photography is used for advertising, menus, cookbooks, social media, and blogs
  • Remember that natural light is essential
  • You can use restaurant pictures and food photos on your restaurant website, menu, and social media channels
  • Any photos of your restaurant are better than none. If you can’t take outstanding pictures, just take whatever you can. Alternatively, consider hiring a photographer

Frequently Asked Questions (FAQ)

What settings are best for food photography depend on where you’re having your shoot. There isn’t a one-size-fits-all answer for the best setting for food photography, however, there are some general tips and settings that work well for most food photographers:

  • Aperture: Use a wide aperture (low f-number) to create a shallow depth of field, which will help isolate the food from its background. This can be in the range of f/1.8 to f/4, depending on your lens.
  • Shutter speed: A faster shutter speed is perfect if you want to eliminate motion blur, especially if you’re shooting handheld. A general rule is to use a shutter speed equal to or faster than the reciprocal of your focal length (e.g.1/50s for a 50mm lens).
  • ISO: Keep the ISO low (100-400) to minimize noise in your images. Increase the ISO only if you’re struggling with low light and can’t use a slower shutter speed or wider aperture.

There isn’t a specific shutter speed that applies to all food photography situations, but there are some general guidelines to help you choose the right one for your needs:

  • Eliminate motion blur: If you’re shooting from the hand or if there’s any movement in the scene, you’ll need a faster shutter speed to avoid motion blur. A general rule is to use a shutter speed equal to or faster than the reciprocal of your focal length (e.g.1/50s for a 50mm lens).
  • Light conditions: Shutter speed will also depend on the available light. In low-light situations, you may need to use a slower shutter speed to allow more light into the camera. 

There are a few common mistakes and practices you should avoid in food photography to achieve the best possible results:

  • Using direct flash: Avoid using your camera’s flash as it can create harsh shadows and unflattering highlights on the food. 
  • Overcrowding the frame: Keep your compositions simple and uncluttered. Adding too many elements to the frame can distract from the main subject and make the image look messy.
  • Ignoring food styling: Neglecting food styling can result in a less appealing image. Pay attention to the presentation of the dish, the choice of props, and the overall color balance. 
  • Using the wrong white balance: Incorrect white balance can result in unnatural color casts that make the food look unappetizing. Always set the correct white balance for the lighting conditions or shoot in RAW format, so you can adjust the white balance in post-processing.

For food photography, the aperture you choose will depend on the desired depth of field and the specific look you want to achieve. For example, a wide aperture (low f-number) is recommended to create a shallow depth of field, which helps isolate the food from its background and draws attention to the main subject. 

  • For a shallow depth of field: Use a wide aperture, typically in the range of f/1.8 to f/4. This will create a pleasing background blur (bokeh) and focus the viewer’s attention on the main subject. 
  • For a deeper depth of field: If you want more of the food and surrounding elements in focus, choose a smaller aperture, such as f/5.6 to f/11. 

To make your food look good in pictures, focus on aspects like lighting, composition, styling, and post-processing. Here are some tips to help you create appetizing food pictures:

  • Lighting: Use soft, diffused natural light whenever possible. Place the food near indirect sunlight, like a window light to avoid harsh shadows. Also, consider playing with the lighting by utilizing front lighting, side lighting, or a white sheet to create natural lighting.
  • Composition: Experiment with different angles and perspectives to find the most appealing presentation of the food. 
  • Food styling: Pay attention to the presentation of the dish, the arrangement of ingredients, and the choice of props. 
  • Color and contrast: Vibrant colors make the food look more appetizing, and contrast between colors can create a striking visual impact. 

You don’t need a fancy camera to take good pictures of food. Smartphone cameras have come a long way in recent years and offer advanced features and capabilities, allowing you to take great shots on your food photography journey – here are some tips for taking great food photos with your phone:

  • Use natural light: Whenever possible, utilize natural light to illuminate your subject. Place the food near a window with indirect sunlight for soft, diffused lighting.
  • Clean your lens: Before taking photos, make sure your phone’s camera lens is clean. Fingerprints or smudges can result in blurry or hazy images.
  • Experiment with angles: Try multiple angles and perspectives to find the most appealing presentation of the food. 
  • Focus and exposure: Tap on the main subject in your phone’s camera app to set the focus and exposure. This ensures the critical part of the dish is sharp and correctly exposed.

Getting started in food photography involves developing your skills, building a portfolio, and promoting your work. A food photographer experiments when creating an eye catching image, so make sure to get creative and come up with your own style. Here are some steps to help you begin your journey:

  • Learn the basics: Understand the essential concepts and techniques in food photography, such as lighting, composition, depth of field, food styling, and post-processing. 
  • Practice regularly: Practice makes perfect. Start by photographing your meals or dishes you prepare at home. 
  • Build a portfolio: Create a portfolio showcasing your best work. Include a variety of food images that demonstrate your skills and creativity.
Juliusz Dzierlatka

Juliusz Dzierlatka

Digital content creator with +7 years experience in marketing, helping restaurants streamline daily operations.

How helpful was this post?

Share this article

Try for free,
no commitment!